Showing posts with label Mickie_G. Show all posts

Tuesday, February 10, 2015

Elevate Your Tired Recipes To New Heights With Spicing Pecans!

Amelia's Spicing Pecans, recipes
My own jars of Amelia's Spicing Pecans
Are you just plain tired of using the same old "tried and true" recipes? I recently found a product that will set your tastebuds on fire with happiness. (Well, not on fire unless you use the "hot and spicy" blend.) So, what is this magical creation that will spice up your kitchen creations? Amelia's Spicing PecansYes, pecans! To quote the now defunct website, "Amelia's Spicing Pecans are made from select roasted chopped pecans, specially seasoned, then used as spicing ingredients to add rich flavors to your favorite dishes." You can now find information about these wonderful pecans on Facebook by clicking Amelias-Spicing-Pecans.

I took Amelia's "Be Creative" challenge and did indeed find that Amelia's kicked up my old boring recipes to a higher notch. 
Why should one use these delectable spiced pecans in recipes instead of just plain pecans? Because Amelia's is made with only the finest all natural ingredients, specifically chosen by Amelia's creator. He oversees the roasting and the flavoring of this Alabama-made product. There were four entirely different flavors to choose from: Herb, Hot & Spicy, Cinnamon and Coffee. 


Remember, these Spicing Pecans are not just nuts that a cook might use to add texture to a recipe, they are finely chopped, seasoned and roasted Southern pecans that add character and depth to the food you eat. 


The first recipe I decided to "renew" was one that really needed spicing up. My original "Pecan Rice" recipe came from a vintage church cookbook. I had planned on making this traditional rice side dish for a family holiday dinner and I wanted it to be very special. I chose to use the herb flavored pecans because that just seemed to "fit" with the menu. 

First, I cooked 2 "boil-in-bag" rice pouches in chicken broth.  I sautéed some celery (onion could be used, too) in olive oil and added that to the drained cooked rice. After stirring in one cup of the 
Amelia's Herb Flavored Spicing Pecans, I had my finished side-dish. No, wait, I chopped up some fresh parsley to sprinkle on the top of the bowl. It looked pretty--should have sprinkled more spicing pecans on the top, too! It was that easy to come up with an improved recipe! (Note: I did not add enough spicing pecans--it was my first try at "being creative" and I chose to be conservative with my measuring cup! Mr. Reardon, the creator of this fab product, almost always recommends using at least 1 1/2 cups --or more-- in recipes.)

rice side dish, spicing pecans
"Pecan Rice" recipe kicked up with Herb Amelia's Spicing Pecans
So excited by the raves from my family about the pecan rice, I began to think of even more ways to use Amelia's Spicing Pecans. The obvious choice is to use the herb flavored nuts in a salad. Yes, I will tell you that the pecans worked very well in mine. It is so much fun to spice up one's culinary life. It occurred to me that the "Hot and Spicy" Amelia's would be good on a salad, too. I went to my local Whole Foods, bought that flavor to add to my growing collection of Amelia's. I was not disappointed in the results of the addition of the subtle hotness of those exquisitely seasoned, roasted pecans to a salad. I even spiced up a simple appetizer of pimento cheese on a cracker by sprinkling the Hot & Spicy Spicing Pecans on top. The Coffee flavor was amazing with the pimento cheese, too, believe it or not.

Then, I had another light bulb moment! These hot and spicy pecans would be great on a pork tenderloin roast. Adapting a recipe for Pecan-Crusted Pork Tenderloin, I used the Amelia's hot and spicy blend with perfect results. My only regret is that I did not crush the pecans into even smaller pieces. They might have not fallen off the tenderloin as easily as they did. Live, cook and learn, I say!

spicing pecans, pork tenderloin
Hot and Spicy Pecan Crusted Pork Tenderloin
Now I am really cooking and being creative! What can I use these spicing pecans on next? Why not take Cooking Light Magazine's Texas Sheet Cake to a higher level? Yes, that is what I will do. Anyway, I need a spectacular dessert to take to a party and this is the perfect chance to show off my baking creativity.

First I made the cake just like the recipe on the Recipe.com website and poured the cake batter into my new KitchenAid 10"x15"x1" Jelly Roll Pan . Yes, a jelly roll pan is a must for a Texas sheet cake!

Next I sprinkled 2 cups of Amelia's coffee blend pecans on the batter and gently pressed them down with a fork. This will keep the pecans pieces from burning--they are already roasted, you see.

spicing pecans, texas sheet cake recipe
Amelia's Coffee Spicing Pecans on top of the uncooked cake batter.

After the cake baked for 22 minutes, a toothpick inserted in the center came out clean signaling that the cake was done. Now for the best part: pouring the boiled icing over the warm cake and gently covering the top with more of the coffee flavored roasted pecans. 

texas sheet cake, spicing pecans
Iced Texas Sheet Cake topped with Amelia's Coffee Spicing Pecans
The aroma of the coffee and chocolate was irresistible. The end result was a delightfully good and moist Texas Sheet Cake. I took it to the party and not a crumb of it remained at the end of the night.

How else can one use Spicing Pecans? Use your imagination and feel free to try anything! I created a Sautéed Zucchini and Squash Pasta dish for dinner one evening with amazing results. A friend suggested that I could have added a cheese like a parmesan to this dish, too. The pecan pieces you see in the photo below are the Herb Spicing Pecans. The addition dressed this dish up and add a satisfying crunch. It was incredible how the sweet flavor of the roasted pecan pieces turned this dish into a culinary event inside my mouth!

pasta recipe, spicing pecans
Sautéed vegetables and Herb Flavored Amelia's over pasta.

You can also put these nuts on leftovers!

zoes chicken salad 
Zoe's Chicken Salad and roasted veggies dressed up with pecans by Amelia!
I am sure you are wondering where you can get your own jar of these inspiring spicing pecans. Just click Amelia's-Spicing-Pecans- and call the phone # listed. When Birmingham Alabama's Pepper Place Saturday Market begins in the springtime, you might find that Amelia's in a booth with samples to try. 

If you are just plain impatient (or are not in Alabama or near a southeastern Whole Foods), you can contact the creator of this unique and versatile product that you MUST have in your kitchen, by emailing spicingpecans@gmail.com. Tell Mike that Mickie sent you.

Disclaimer: I do not receive any compensation for sales of Amelia's Spicing Pecans. I purchased the Herb and Hot and Spicy Spicing Pecans you see int he photos on this page at Whole Foods and Organic Harvest Market in Birmingham, Alabama. The creator of Amelia's did graciously give me the Coffee Flavored Spicing Pecans to try in the Texas Sheet Cake recipe.


Note: The author may receive a commission from purchases made using links found in this article. “As an Amazon Associate, Ebay (EPN) and/or Esty (Awin) Affiliate, I (we) earn from qualifying purchases.”


Tuesday, September 2, 2014

The Best 1,200 Gallon - EPIC Ice Bucket Challenge on YouTube!

I want to share this excellent ALS Ice Bucket Challenge YouTube Video made by Town and Country Ford in Bessemer, AL. My son-in-law Kyle Sain did all the talking in the video, hence my prejudice in calling this the BEST Ice Bucket Challenge! So proud of the team's creativity in the way they accomplished their EPIC challenge.

The Town and Country Ford Team then went on to throw down the gauntlet for TWO impressive people. One is the current President and CEO of The Ford Motor Company, Mark Fields and Retired President and former CEO of The Ford Motor Company, Alan Mulally.

 Remember to make a donation to ALS!

Sorry, video is no longer available for sharing


Note: The author may receive a commission from purchases made using links found in this article. “As an Amazon Associate, Ebay (EPN) and/or Esty (Awin) Affiliate, I (we) earn from qualifying purchases.”


Tuesday, July 15, 2014

Banish Summertime Boredom with Greeting Card Craft Projects!

"Hey Mom (or Dad), I'm bored! What can I do?"

 How many times have you heard those words in your lifetime? Summer is usually when those words ring out in even the busiest homes. The best advice I can give you is to have plenty of paper, glue sticks and colorful markers on hand. If you have a good public library, I suggest that you go to the "Arts and Crafts" section and look for books about greeting card making.

I recently found a delightful crafting book at my own public library.  Pop-Up Paper Structures: The Beginner's Guide to Creating 3-D Elements for Books, Cards & More is jammed packed with well-written instructions for making creative pop-up greeting cards for all kinds of occasions. The best part is that you can adapt any of the design concepts so you can use supplies that you might have on hand. Those are MY kinds of projects--the ones that reuse stuff!

pop-up paper structures book


I have a big storage box where I keep all of my hoarded paper supplies. (If you are a regular reader of this blog you might remember my post about re-using greeting cards. ) That big box is the home for the file with all those greetings card pieces. There is also a big zipper bag with my favorite tools and glues in that same big box.

I am sure your older children will be able to find a pop-up greeting in the book shown above, that they could figure out how to make. Just remember, dear parent, try not to be too critical and just go with the flow. So what if some of the cutting is not as straight as you might expect. Let your children be creative. Sometimes their ideas might just be better than yours.

If you are not in the red and green "holiday" spirit yet, you should read "How to make a Watermelon Card Invitation for Summer Parties", make the card then throw one! Not a watermelon--a party! You will still be red and green, but this card will not feature any holly or red noses!


greeting card craft projects
 "Creative Ways To Recycle Holiday Greeting Cards"
Have you saved a ton of cards, you most definitely should read Creative Ways to Recycle Holiday Greeting Cards. This page abounds with many of ideas for recycling those greetings. I particularly like the projects for a "Star Tree" and a "Woven Card" (see them above--Thank you AcornOakForest for allowing me to use your image!). You will be happy to know that there are wonderful photo tutorials to walk you through the steps for making both of these green crafty projects.

If you need a good crafting glue for paper projects, I highly recommend Elmer's Craft Bond Fabric and Paper Glue. I use it myself to repair books and make my own greeting cards.


Note: The author may receive a commission from purchases made using links found in this article. “As an Amazon Associate, Ebay (EPN) and/or Esty (Awin) Affiliate, I (we) earn from qualifying purchases.”


Saturday, June 28, 2014

Going to Disney? Save your memories!

disney scrapbook memory autograph book
Child Holding a handmade Disney Memory Book
©Mickie Goad
Some of you might be heading to Disneyworld or Disneyland soon--or maybe you know someone who is dreaming about taking the trip to this magical world.

A visit to this wonderland for children will be remembered for a lifetime so you should think about a way to preserve and collect these memories.

A few years ago, my husband and I decided to visit the Orlando park because 6 of our 7 grandchildren were headed there during the same week! Oh my goodness! How could we NOT go?

I decided I wanted to create a handmade autograph and memory book for my precious babies. I had a definite project in mind and I did a lot of thinking about how I could make the best scrapbook for them.

That memory book had to be big enough to hold a one photograph on a page. Hmmm. That meant the book had to be at least 4"x6".  The book should not be too big, however, as it must fit in a mom's purse or a backpack.  I wanted the pages in the book to be thick enough so that a pen would not bleed through to the other side of the page. I decided that the book should have a spiral binding so it could open wide enough for the "characters" to easily hold it and sign it, too.


disney scrapbook autograph memory book
One of the Finished Handmade Disney Autograph Books
©Mickie Goad

As you can see, Goofy had no trouble holding the memory book for two of my grandchildren. My grand-daughter had been to the "Princess Beauty Salon", by the way. Her hair is NOT curly.
goofy signing a disney memory book
Goofy signing the Disney Memory Book for my grandchildren. ©Mickie Goad


 The image below is how I dreamed the book would be used: notice the photo above the autograph! Yes, I gave my grandchildren something of value.

disney scrapbook autograph book
Chip -n-Dale Memory from Disneyworld ©Mickie Goad


If you want to see how I created the Disney Memory Books, you can visit two of my pages: How to Make a Disney Memory Book and Create a Child's Disney Memory Book.

The first page is where I made the original books that were red. The second page was written last year when the 7th grandchild got to go to Disneyworld. I let her help make the scrapbook and you can see what a fun project it was by clicking the "Create a Child's Disney Memory Book" link above.

I hope I have inspired you to make your own journals or scrapbooks to hold all those memories you create on your travels to that wonderful world of magic!

Going to Disney does take some planning!


Photo and content Credits: ©Mickie Goad
Do not use without permission


Note: The author may receive a commission from purchases made using links found in this article. “As an Amazon Associate, Ebay (EPN) and/or Esty (Awin) Affiliate, I (we) earn from qualifying purchases.”


Monday, June 16, 2014

How to Turn An Ordinary Rock Into an Oil Lamp

rock oil lamp
Yes, you can make a rock into a lamp like the one seen here. My friend, Shelley, recently published a tutorial, Caveman Lamp for a Modern Table, on Hubpages and I would love to share it with you.

Shelley used to work for a "home and garden" magazine and learned a great deal about crafting home decor during her tenure there.

It might be hard to believe that my friend (who is a real lady) made this de-light-ful lamp from an ordinary rock. In her tutorial, Shelley shows you exactly what products she used to craft this cozy lamp. I will tell you that on a scale of 1 (easy) to 10 (difficult), this project will probably be a 5. Having the help of a resident "caveman" would come in handy, I am sure. Shelley also makes recommendations for products to use for making this oil lamp. Her step-by-step instructions make this craft project a do-able one.  I honestly think that even this "Wilma" could make a rock into an oil lamp without the help of a "Fred, but I am really quite handy. My husband might not realize this fact because I allow him to believe that he is the head caveman.

I can just picture a set of these rock oil lamps on the railing of my deck. Shelley says that one can use citronella oil in the reservoir to ward off bugs if you use these lamps for outdoor lighting. Ah, the bug free atmosphere is already calling me to find some rocks and get drilling!


Note: The author may receive a commission from purchases made using links found in this article. “As an Amazon Associate, Ebay (EPN) and/or Esty (Awin) Affiliate, I (we) earn from qualifying purchases.”


Friday, June 6, 2014

Garden Decor Project: Make a Mosaic Pot

handcrafted mosaic pot
Mosaic Pot by Mickie_G
A few summers ago, I made the mosaic pot you see to the left at a workshop sponsored by Aldridge Gardens in Hoover, Alabama.

Ever since I was a child, I have loved creating crafts that involved tile. I remember my mother taking me to the hobby shop every year just before our annual summer visit to my grandmother. My mom knew that if she let me pick out a craft kit, I would not get bored. More often than not, I chose a mosaic kit.

I still remember the 6" circular dish I made with prayerful hands in the middle. The kit came with enough 1/4 inch square tiles for me to play with the design if I did not want to make one just like the example on the box lid. I usually I ended up choosing a checkerboard pattern.  These mosaic craft kits filled my days with much happiness and gave my parents a vacation from entertaining me, I imagine. But enough reminiscing!

I won't go into how I made the mosaic pot shown in the images on this page, but I will share with you some things I did learn about tile covered pots:


  • Do not leave your mosaic pot outside during the winter months as the freezing temperatures will cause the pot to break and the mosaic pieces to fall off.
  • If you use broken dishes or crockery, it is best to use totally flat pieces if you use larger, broken bits.  It is easier to rub off the grout if there are no sharp points that are higher than your decorative shards. You can see in the photo below that I used some broken pieces from a plate. I should have trimmed the sharp points on the edges off. 
  • To break up dishes and crockery, put them between several sheets of newsprint before you break them up with a small hammer. 
  • If you want to preserve the pattern as it is on the dish, use duck tape on the back of the dish before you break it into pieces.
  • Try to fit the "tiles" close together as possible but still leave enough room for the grout. I think I left too much space so there is a lot of grout space. 
  • Wear a mask to mix up your dry grout and powdered mastic. This is a MUST!
  • Gloves for your hands are another must when rubbing in the grout. Surgical ones work best. 

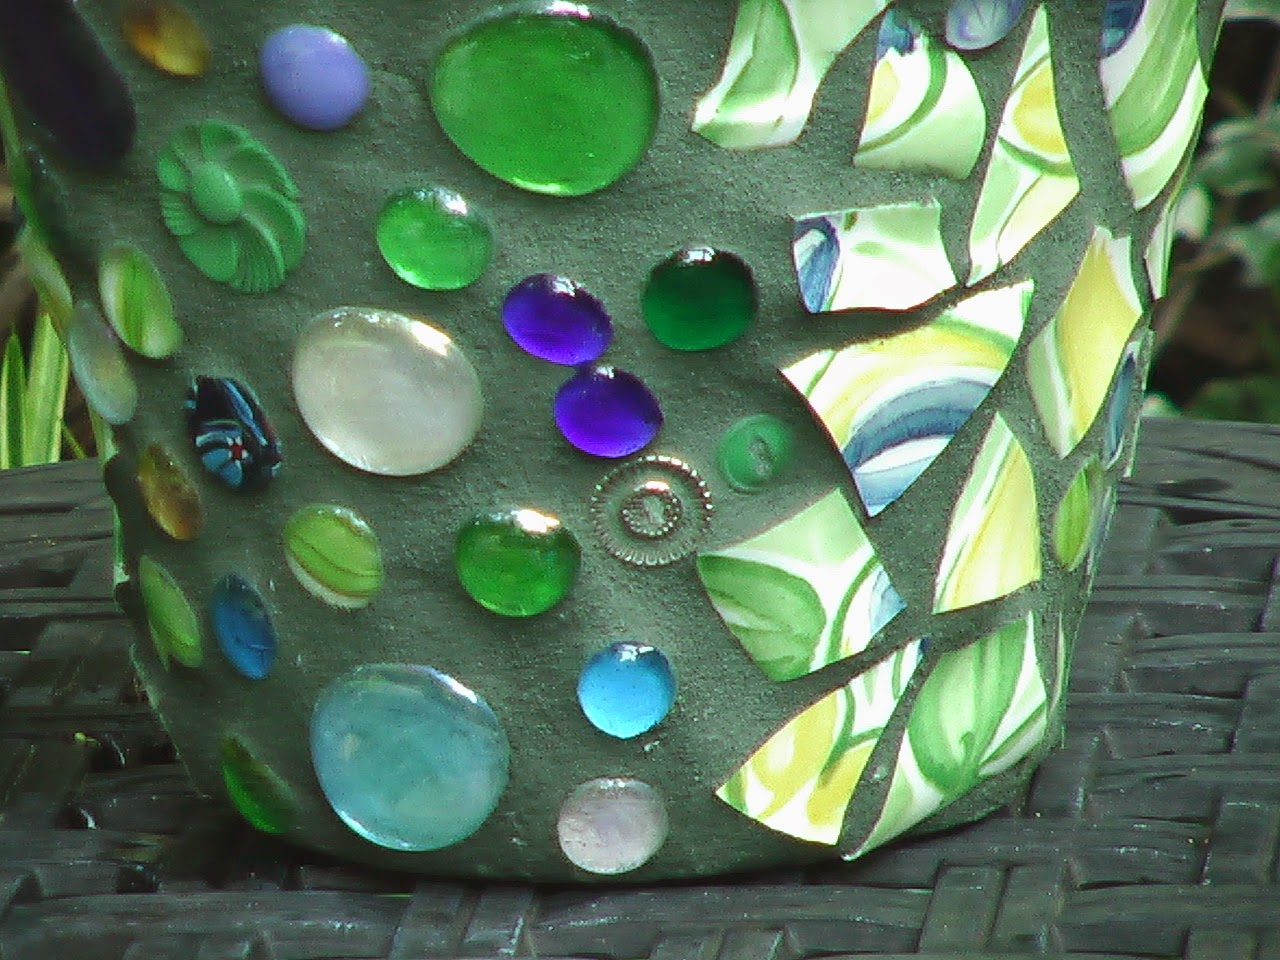
Close up of my mosaic pot. 

mosaic craft 
I used glass globs and a broken dish. 
Can you see the buttons, too?


I am a "keeper" of useful things and a recycler of the broken and chipped, so I have a stockpile of broken dishes and pottery. However, I do not have the supplies like the grout and ceramic tile adhesive for making a mosaic piece.


Here is a video by "DIY Maven" that I discovered on YouTube that shows a very similar and easy process for making a mosaic flower pot.


There are several articles on Squidoo that might whet your appetite for making other types of mosaic crafts. Unfortunately, there are none about how to make a pot like mine. How To Mosaic: Art For Your Garden is a good introductory article to the craft of mosaics. 


If you like the idea of a "kit", I found several mosaic craft kits for children available on Amazon. Here are a few links for you: Kits for ages 14+kits for ages 14 or overkits for ages 8 to 13kits for age 8-13; Kits for ages 5-7 yearskits for ages 5-7; Kits for ages 2 to 4. Most of the kits for young children use foam pieces and no grout. That is a good thing.

Keep your hands busy, y'all!


Photos: Mickie_G - all rights reserved.


Note: The author may receive a commission from purchases made using links found in this article. “As an Amazon Associate, Ebay (EPN) and/or Esty (Awin) Affiliate, I (we) earn from qualifying purchases.”


Friday, May 30, 2014

Flip Flop Time!


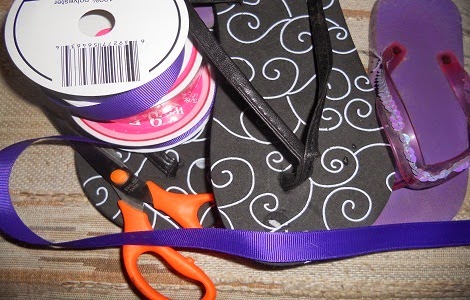
flip flop craft idea
With summer on the horizon and beach vacations in the works, I have decided that it is definitely "Flip Flop Time!"

What better way to get your family excited about summer than creating cute, inexpensive footwear to wear on that beach vacation?  If you shop wisely and use stuff you already have on hand, you could create new sandals for every summer outfit or bathing suit you own. Of course, you should remember that "You Get What You Pay For",  so if you want your personalized sandals to last, buy the best shoe you can afford.  Really examine the shoe to make sure it is made well and will not break the first time you wear it.  Bend that shoe and pull on the straps!

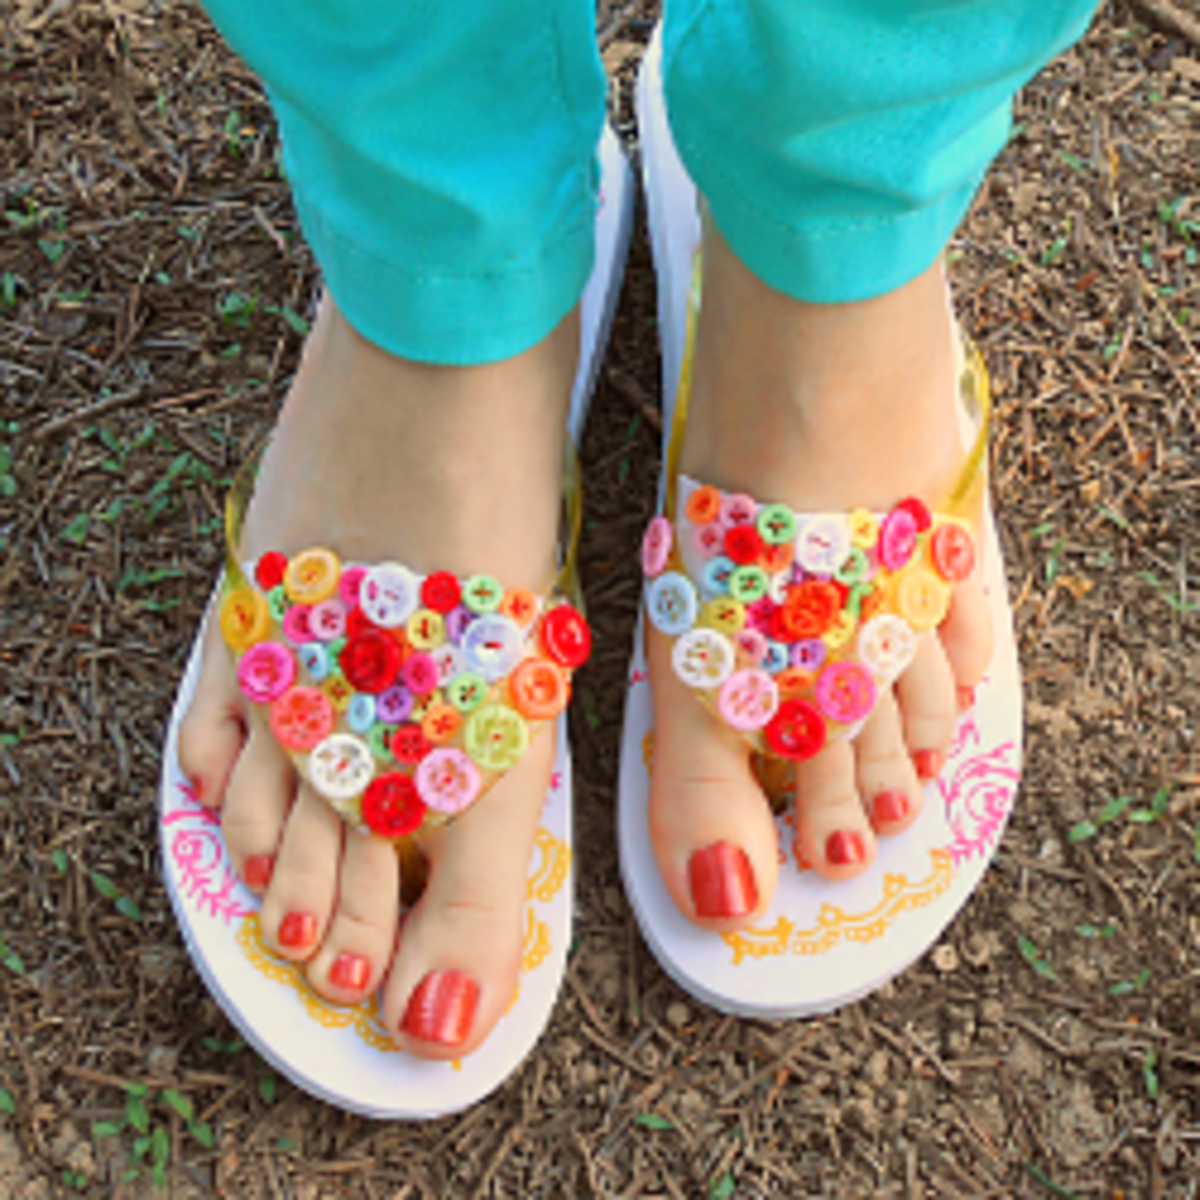
If you have a ton of buttons in your craft cache, you should read DIY Button Flip Flops . One of the best ideas I found on malina123's page on Squidoo, involved recycling an old pair of shorts for use on her summer flipping footwear! By reusing a bit of fabric, she completely refashioned an ordinary pair of beach thongs into a colorful fashion statement. (Thank you, malina123 for letting me use the image below!)

colored button flip flops


Of course if you think you might try this project shown above, you should probably own a glue gun. (Click here to find a top rated glue gun on Amazon!glue gun)

However, one does not have to use a glue gun to decorate your flips if you want to use beads or rhinestones. One blogger suggested using E6000 Adhesivedecorate flipflops with beads and rhinestones.  I have read many good reviews for this product on Squidoo and on the Amazon website. I highly recommend that you research products before you buy them.

Need more ideas for creating summertime sandals with lots of bling? Then I would like to send you to Make Your Own Bedazzled Flip Flops on Hubpages.com. There you find will several suggestions (ie. buy your flip flops at Old Navy) and tips for adding your own style to your flip-floppy summer shoes.

Another blogger alerted me to a product I had never heard of before, Beacon Flip Flop Glueflip flop glue.


One last Tip: Prepare the rubber straps on your purchased flip-flops by cleaning them with rubbing alcohol or vinegar to remove any reside that might inhibit the glue from sticking to the shoe. It also helps to scuff up the surface of the strap with an emery board, too.

Now that you have all of these wonderful summer sandals, you might need to store them somewhere! I saw an "green" idea to recycle old wire clothes hangers that just might help you out! Click "Shoe Hanger"  to be taken directly to a photo of that shoe hanger. Lensmaster lbrummer found  lots of ways to upcycle clothes hangers from all over the web.

Now, you can begin summertime with your best-looking foot forward.


(flip flops with ribbon photo credit: Lyn Lomasi via photopin cc)


Note: The author may receive a commission from purchases made using links found in this article. “As an Amazon Associate, Ebay (EPN) and/or Esty (Awin) Affiliate, I (we) earn from qualifying purchases.”


Monday, May 19, 2014

A Craft Project that eases my fear of Spray On Glue!

I have always been afraid to try aerosol adhesives! Yes, I am a chicken when it comes to paying good money for something that I have no idea how to use -- also, I have heard "glue everywhere!" horror stories from my friends who have tried using such products and I was definitely scared off. Even my own daughter tried using a  good name brand  spray adhesive for a design project when she was in college and told me in precise detail why she would never use a spray glue again. 


spray glue demonstation

(*Always follow manufactures's suggestions on the safe usage of their products! Click 3M: Tips and Techniques to read about how to use a spray on glue.)


Today, however, I am inspired to give spray on glue a try. "Why?" you are asking. Well, I recently read an article that gave me inspiration for a project that would put this sticky product to a good use.

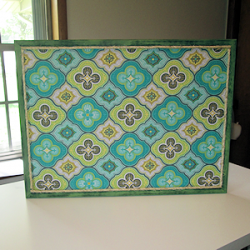
retro style bulletin board made with spray glue


How I Made My Retro-Style Bulletin Board for My Craft Room  written by a Review This! contributor, decoratingforevents, showed me in excellent photographic detail how to create a bulletin board for my own home office. One tip I found especially helpful was to use "re-positionable" spray-on glue. That tip totally made good sense for someone like me who is very often a crafting klutz.


Lensmaster Decoratingforevents also found some very attractive retro-fabrics that took me back to the 50's and 60's. (Who would have ever predicted that the futuristic designs of that bygone era would EVER come back in fashion?) Another reason I like this bulletin board project: the author used a Glue Gun! As as a Glue Gun Slinger  that made me very happy, indeed.

Now, I am off to drool over the fabrics that decoratingforevents found on Amazon to see which one I can use to pull my "office" together with my own retro-style bulletin board. I just might purchase some spray adhesive, too.


Note: The author may receive a commission from purchases made using links found in this article. “As an Amazon Associate, Ebay (EPN) and/or Esty (Awin) Affiliate, I (we) earn from qualifying purchases.”


Tuesday, May 13, 2014

Mod Podge can make miracles happen!

craft idea modpodge
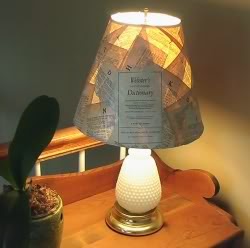
A Dictionary Lamp--just needs some trim!
A few years ago I got the "make over" bug and decided to re-do an old lampshade (that is a link to my DIY page, btw).  I used what I had on hand and you can see the result in the photo to the left. Yes, I did rip up an old dictionary! Do not hate me, because the book was already headed to the recycle bin. Those of you who know me will confirm that I never destroy a book that is still in good shape. I then decoupaged the pages from that torn up book onto the lamp using watered down craft glue. This recycled lampshade project turned out pretty good. 


While I was the The Glue Gun Slinger Contributor on the now defunct website, Squidoo, I  discovered that I could have used ModPodge (by Plaid) for the project instead of that diluted glue! Using a glue + water mixture was successful for me at the time, however. As it turns out, lots of people use a homemade version of ModPodge just as I did on my lampshade project. Tracy Boyer wrote and article and shared a recipe for this economical adhesive mixture for those of us who don't want to guess at proportions.  The Tracy suggests 2 parts glue to 1 part water.

Sometimes using a name brand commercial product will produce consistently good looking results. I have to admit that my own decoupage medium did not look as good after it dried as some other projects that I have seen at craft fairs and such. 


Now, I need to haul out the glue gun and put some trim on that dictionary themed lampshade. Who knows, I just might give it a fresh coat of ModPodge! Stay tuned for the results!


Note: The author may receive a commission from purchases made using links found in this article. “As an Amazon Associate, Ebay (EPN) and/or Esty (Awin) Affiliate, I (we) earn from qualifying purchases.”


Sunday, May 4, 2014

Do Not Toss Your Greeting Cards--Reuse Them!

I am a hoarder! I will admit that to you, but you have to promise not to tell my friends and family.

I mostly hoard greeting cards that I cannot bear to toss into the recycle bin or trash barrel. In order to save space, I usually tear off the front of the card so I can use the artwork again in some other form (ie. gift tags -- see the image below, the stocking tag used to be the front of a greeting card).

However, the one practical use is to recycle the front of the card INTO another greeting card. That is actually very easy to do. All you need is some card stock or blank greeting cards and envelopes. You then just cut the original front to fit on the new blank card. Sometimes I find the written verse in a card to be so very good that I trim off the signature on the card and so I can "borrow" the sentiment and glue it into my "new" card.

gift bag stenciled with green tree and snowflakes

Having been the "official" Glue Gun Slinger Contributor on the now defunct website, Squidoo, I do have a few adhesives in my crafting tool kit, but my knowledge about glues for "paper" crafts is mostly limited to book repair. However, I have been know to make a paper craft project or two, and I highly recommend Elmer's Washable All-Purpose School Glue Stickscraft glue

While you are on the site, be sure to check out "Card Making and Craft Budget Tips" by writer/crafter "paperfacets". If you are at all interested in making greeting cards, this page will be helpful, indeed.

I have read that it is best to use a glue that will not "wrinkle" the card stock when making a card. Does anyone have a good suggestion for me to try? I am thinking that a glue stick might work. What about glue dots? Has anyone used them? I really like to know about a product before I invest my hard earned cash.


Note: The author may receive a commission from purchases made using links found in this article. “As an Amazon Associate, Ebay (EPN) and/or Esty (Awin) Affiliate, I (we) earn from qualifying purchases.”


Sunday, April 27, 2014

Crafting is not just about having a Glue Gun!

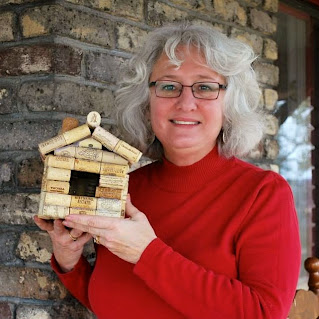
I am Mickie and I was formerly known as "The Glue Gun Slinger" contributor on Squidoo (Now Squidoo is no more and all of my articles are on Hubpages.) It was my job to find wonderful craft projects that use some kind of glue and share them with my followers. For example, I recently discovered how to make a birdhouse out of wine corks (yes, that is a link!) and published my own page featuring this project. As can be expected from this Glue Gun Slinger, that project uses lots of hot glue and a glue gun. Here is a photo of my friend, Toni, and her bird house:

bird house made out of wine corks


What I would love to be the most famous for, however, is "saving the world, one book at a time"! My favorite way to use glue is for repairing books. Yes, real everyday paper books that have actual pages you can turn with your very own fingers.

I am a retired librarian and I learned how to make repairs while working and volunteering in public libraries. I have written several tutorials on subjects like repairing a child's Bible, repairing a torn page,  and reattaching a cover to a board book. I even have an article about (of all things!) The Best Glues for Book Repairs.

While I was the Glue Gun Slinger, I corralled many sticky projects on a Pinterest Board that you can visit by clicking here. I just know that you will find a craft that you would love to make! Make sure you have glue!

What am I crafting now? Greeting Cards. With Mother's Day and Father's Day quickly approaching, I wanted to find an easy, yet spectacular personal card for those occasions. One page I found on the Hubpages website was Old Book Page Crafts by "lbrummer". This contributor shares ideas for using pages from books to craft beautiful projects. Yes, this might involve tearing apart a book, but sometimes books are beyond repair and the best use for them is to upcycle those tomes into something beautiful. I have even used pages from an old dictionary to cover an old lampshade using glue thinned with water as the decoupage medium.


lamp shade covered with book pages

So, as you can see, I have more than just a glue gun in my holster!


Note: The author may receive a commission from purchases made using links found in this article. “As an Amazon Associate, Ebay (EPN) and/or Esty (Awin) Affiliate, I (we) earn from qualifying purchases.”


Most Recent Reviews on Review This Reviews


Search for Reviews by Subject, Author or Title

The Review This Reviews Contributors


SylvestermouseSylvestermouseDawn Rae BDawn Rae BMbgPhotoMbgPhotoBrite-IdeasBrite-IdeasWednesday ElfWednesday ElfOlivia MorrisOlivia MorrisTreasures by BrendaTreasures by BrendaThe Savvy AgeThe Savvy AgeMargaret SchindelMargaret SchindelRaintree AnnieRaintree AnnieLou16Lou16Sam MonacoSam MonacoTracey BoyerTracey BoyerRenaissance WomanRenaissance WomanBarbRadBarbRadBev OwensBev OwensBuckHawkBuckHawkDecorating for EventsDecorating for EventsHeather426Heather426Coletta TeskeColetta TeskeMissMerFaeryMissMerFaeryMickie_GMickie_G


Review This Reviews is Dedicated to the Memory of Our Beloved Friend and Fellow Contributor

Susan DeppnerSusan Deppner

We may be apart, but
You Are Not Forgotten


“As an Amazon Associate, Ebay (EPN) and or Etsy (Awin) Affiliate, I (we) earn from purchases.” Disclosure Statement

X